Cookie Decorating with Kids
I used to love to make cookies with my family; it was a tradition in our house growing up. I USED to think it was fun and I enjoyed it, BUT life became hectic as a MOM and I just stopped it!! I hated the mess and I never seemed to have enough time or energy in my day for all of the steps it took to do it. Now that I am (slightly) older (haha), I realized that it can be fun and enjoyable once again with these simple “hacks”. I wanted to share these you all of you, as well.
Cut-Out Cookie Hacks
Here’s my first A-HA… It doesn’t have to be an all day event! Duh!! Break it up and do it in STAGES that will work in your schedule; this way it doesn’t seem so overwhelming.
Stage 1: Make dough and start rolling it out.
Use your favorite cookie cut-out recipe. Or, save MORE time by purchasing your favorite refrigerated, pre-made, sugar cookie dough.
If you don’t have time for cut-outs and baking, put the dough between two pieces of parchment paper and flatten the dough with your hands to a “decent” size shape (based on your preferences). This will make it easier to roll when you have time. I try to make it about a quarter inch thick or slightly thicker. You can easily store in a refrigerator or freeze until you’re ready to use for cut-outs.
Stage 2: Cut out your cookies and bake.
HACK: Use parchment paper instead of flouring the surface of your counter space. It’s less of a mess, the cookie dough won’t stick, and you can use it in the oven.
There are benefits to using parchment paper. Yes, parchment paper, NOT WAX PAPER. I know it costs a little more, but it’s worth it for the EASE (after all, you’re worth it).
Parchment paper is the best choice for cooking, and doesn’t burn when heated (most brands can withstand temperatures up to about 420 degrees Fahrenheit).
Parchment paper is good for lining cookie sheets, and it eliminates the need to grease the pan. Remove any excess dough and pick up parchment paper with cookie dough cutouts and transfer it directly onto baking sheet. No need to pick up each cookie until after they’ve baked and have cooled. .
This way you ensure that the cookie cut out stays in its shape and looks good.
PLUS: Parchment paper keeps you from having to scrub dirty cookie sheets – making cleanup faster and easier.
TIP: Remember to use those dough scraps to fill-in any odd shapes of the cookie cutters missing a little piece/part to make the cookie complete.
ALERT: WAXED paper is NOT meant for use in the oven — the wax coating on it will melt if the paper is exposed to direct heat — so use it for wrapping up sandwiches or food for cold storage.
TIP: Flour your cookie cutters. Put some flour on a paper plate and dip the cookie cutter so the dough does not stick. If your dough is sticky, add a little flour to the parchment paper and the dough (sometimes pre-made, store-bought dough can be sticky).
TIP: If you’re not decorating today, then after your cookies have baked and cooled completely, stack them in airtight containers and store or freeze until you’re ready to decorate.
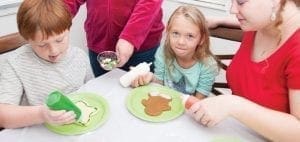
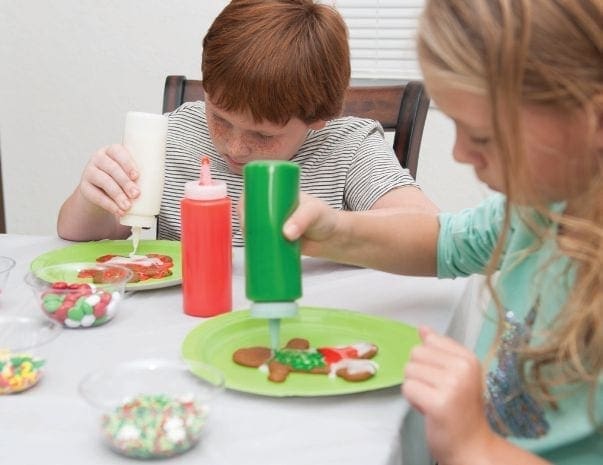
The easiest method I found for decorating cookies with kids is to use a squeeze bottle (for myself and the kiddos).
Stage 3 Make Icing
HACK: Use SQUEEZE bottles. This is the simplest, most straight-forward way to decorate cookies with icing. It’s so easy that everyone can do it.
Here’s my simple icing recipe, once icing is made and tinted with colors in advance and place in squeeze bottles (I used Wilton).
TIP: Icing can be made and tinted in advance and stored in the refrigerator for a few days.
Stage 4: Decorating day
- Have everything ready before you invite the kids into the kitchen.
- Set the table with a plastic tablecloth, colorful paper plates, and little plastic ramekins/containers to hold the sprinkles and decorations.
- Icing: Before you start to decorate the cookies, bring the icing out and let it acclimate to room temperature.
 TIP: If the icing is too thick, you can thin it with a bit of water. You’ll want the icing to be easily squeezed out of the bottle but not so thin (like a flooding icing) that it runs off the cookies.
- Place one cookie at a time on a solid colored paper plate (with an edge) for child to decorate. By having them decorate on a paper plate it catches any excess icing or sprinkles from spreading to table cloth, clothes, or landing on the floor.
ALERT: Use a plastic spoon for ramekin filled with sprinkles or decorations. That way, you prevent frosting covered hands from grabbing all the sprinkles.
Most everything you need can be purchased from the “dollar store”.
Make sure each child gets to make a cookie and take a cookie.
Let dry and store in an airtight container.
For easy packaging before they’re dry (if guests will be taking cookies home before they’re dry) place another paper plate upside down on top of it so it creates a “container”, tape the sides and you can use a plastic bag to carry them home.
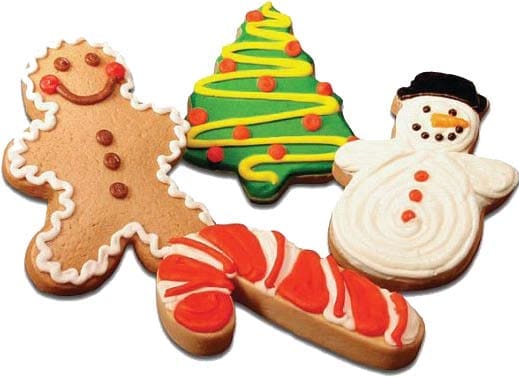
REMEMBER: We’re not going for perfection here, we’re going for stress FREE family fun and, maybe, a tradition the entire family can do togethe
Enjoy the holidays again…..I know I do!
Related: Simple Cookie Icing (Squeeze Bottle) Plus 4 “Hacks to Help!” [1]
Photos By Terry Jaszcz
More Family Holiday Cooking
- GFCF Holiday Cookie Recipes [2]
- Cooking with Kids: “ Chocolate Caramel Apple ” Cookies [3]
- A Guide to a Natural and Healthier Cookie Jar [4]
- GFCF Holiday Recipes and Hints on Eating Outside of the Home [5]
- Fall Means Pumpkin GFCF Recipes to Enjoy this Cozy Autumn Season [6]
- Recipes for the Holidays While on a Special Diet [7]
- GFCF/Chemical Free Holiday Breakfast or Brunch [8]
- Where to Purchase Gluten Free Casein Free (GFCF) Foods and Some Favorite Brands [9]
- Special Diets for a Variety of Disabilities & Disorders [10]
- Holidays Require Candy [11]
- Tech Tools for Family Holiday Cooking [12]
Cooking With Kids
- Cooking With Kids: Easy Sufganiyot (Jelly Doughnuts) [13]
- Cooking With Kids: Festive Holiday Pretzel Treats [14]
- Grinch Popcorn Festive And Fun Perfect For The Holidays [15]
- Cooking with Kids: Festive Pretzel Salad [16]
- Cooking with Kids: Peanut & Apple Butter French Toast Bake [17]
You May Also Like
- Holiday Help Things I Found to Be Helpful! [18]
- Surviving the Holidays [19]
- 8 Tips to prepare your family members with special needs for the Holiday Season? [20]
- Socialize Successfully: A Few Simple Tips to Help You During the Holiday Season [21]
This post originally appeared on our November/December 2018 Magazine [22]